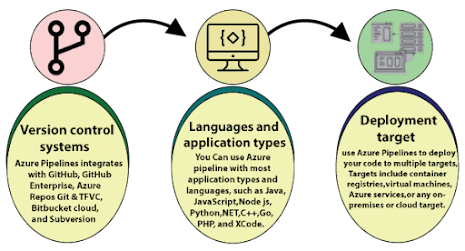
Azure Pipeline is a cloud service that we can use to build and test our code project automatically. The Azure pipeline has a lot of capabil...
Azure Pipeline is a cloud service that we can use to build and test our code project automatically. The Azure pipeline has a lot of capabilities such as continuous integration and continuous delivery to regularly and consistently test and builds our code and ship to any target.
- Pipeline: It is a workflow that defines how our test, build, and deployment steps are run.
- Stage: It is a logical boundary in the pipeline. It can be used to mark the separation of concerns. Each stage contains one or more jobs.
- Job: A stage can contain one or more jobs. Each job runs on an agent. It represents an execution boundary of a set of steps.
- Step: It is the smallest building block of a pipeline. It can either be a script or a task. A task is simply an already created script offered as a convenience to you.
- Agent and Agent pools: An agent is an installable software that runs one job at a time. Instead of managing each agent individually, you organize agents into agent pools.
- Artifact: It is a collection of files or packages published by a run. The Artifact is made available to subsequent tasks, such as distribution or deployment.
- Trigger: It is something that is set up to tell the pipeline when to run. We can configure a pipeline to run upon a push to the repository, at scheduled times, etc.
- Environment: It is a collection of resources, where you deploy your application. It contains one or more virtual machines, containers, web apps, etc.
- Checks: Checks define a set of validations required before a deployment can be performed.
- Runs: It represents a single execution of a pipeline and collects the logs associated with running the steps and the results of running tests
Lab
Create New Pipeline
Step 1: Select Pipeline and Click on Create pipeline button.
Step 2: Select Azure Repos Git and select the repo which has Asp.net Core application
Step 3: Select Asp.Net Core Run time.
Step 3: Modify the script as below
trigger:
- master
pool:
vmImage: 'windows-latest'
steps:
- bash: echo "Hello Azure DevOps Pipeline"
Step 4: Click on Save and Run Pipeline.
Step 5: azure-pipeline.yml file will be created and versioned in master branch.
Edit Existing Pipeline
Step 1: Select the pipeline and click on Edit
Step 2: Update the code as given below and click on save button
trigger:
- master
pool:
vmImage: 'windows-latest'
jobs:
- job: FirstJob
timeoutInMinutes: 10
steps:
- bash: echo "First Job"
- job: SecJob
steps:
- bash: echo "Sec Job"
Step 3: Once you save the pipeline will be automatically get executed.


COMMENTS